
Dynamic Sauna Assembly Made Simple
Dynamic Saunas are popular for their energy efficiency, therapeutic benefits, and quality craftsmanship. To fully enjoy these features, proper assembly is essential. This comprehensive guide walks you through everything you need to know to set up your Dynamic Sauna safely and efficiently — from preparation to care tips.
Key Takeaways
- Prepare your tools, location, and power supply in advance.
- Follow each assembly step in sequence for safety and performance.
- Post-assembly care ensures your sauna lasts and functions optimally.
- Simple techniques like session timing and cooling breaks enhance your experience.
Benefits of Dynamic Saunas
- Advanced Infrared Technology: Delivers deep, even heating using Far Infrared rays without heating the surrounding air.
- Energy-Efficient Design: Optimized for maximum output with minimal power usage.
- Built for Safety: Includes temperature sensors and protective design for safe operation.
- User-Friendly Interface: Intuitive control panel allows easy temperature and time adjustments.
- Durable Construction: High-quality materials ensure long-term use and structural reliability.
- Customizable Experience: Adjustable settings help tailor each session to personal preference.
Pre-assembly Considerations
- Tools Needed: A screwdriver and ladder. Assembly requires two adults.
- Power Supply: Only use the designated sauna power plug and outlet.
- Surface: Install on a level, dry floor. Avoid direct contact with water.
- Moisture Control: Place a barrier under the sauna if the floor is damp.
- Fire Safety: Do not place flammable objects or chemicals near the unit.
Step-by-Step Assembly
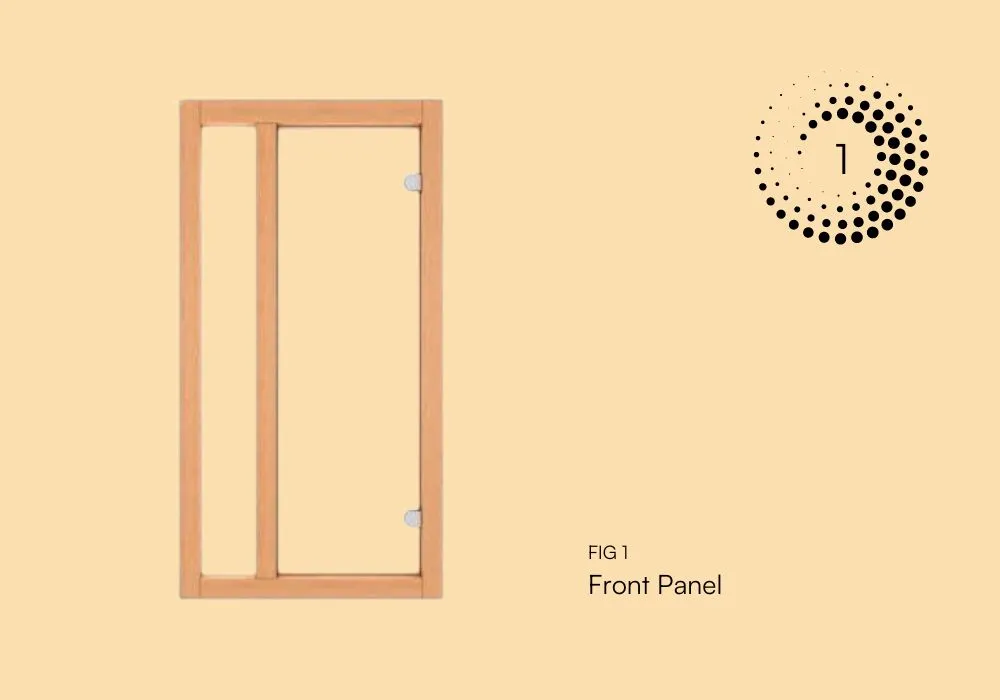
- Step 1: Choose a spacious location. Remove and position the front panel upright where the sauna will be assembled.
- Step 2: Attach the left panel by aligning and sliding the brackets into place with the front panel.

- Step 3: Attach the right panel using the same method.

- Step 4: Place the floor panel at the rear of the sauna room, ensuring it is flush with the front panel.

- Step 5: Install the rear panel, latching it to the side panels and aligning guide tabs and slots.

- Step 6: Lift and place the roof panel, ensuring all wires from the walls are passed through the roof holes before setting it in place.

- Step 7: Connect all electrical plugs and wires securely to the outlets on the roof panel.
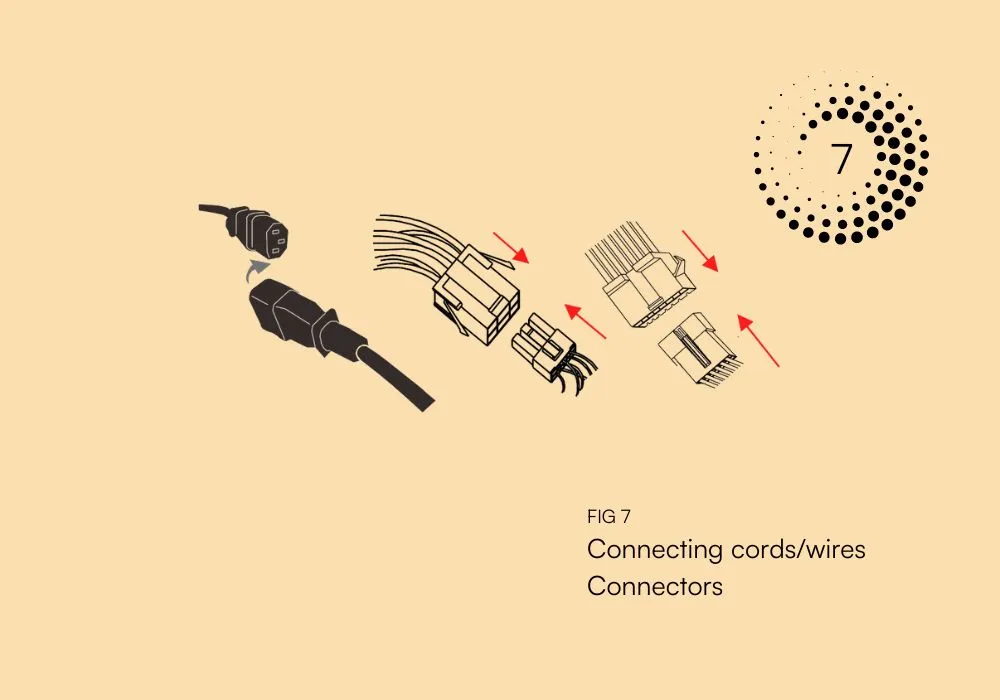
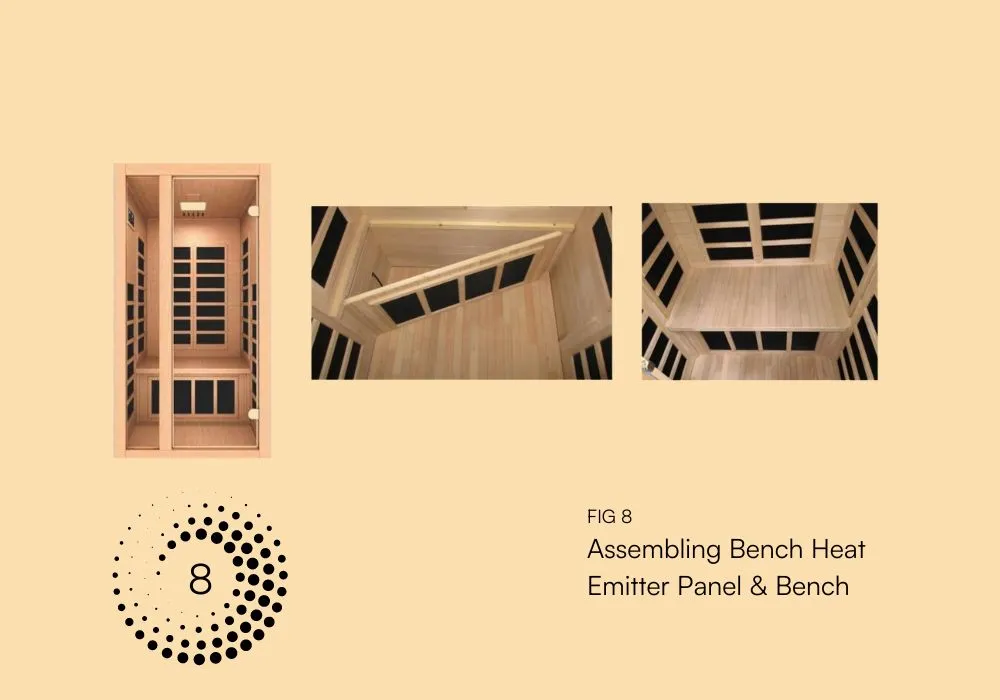
- Step 8: Attach the door handle and install the bench emitter panel. Connect the heater cord and screw the bench into position.
- Step 9: Plug in the sauna and test the control panel. Once verified, install the roof cover and feed the power cord through the designated opening.

- Step 10: Remove the protective tape from the temperature sensor inside the sauna and point it downward.

Video Guidelines for Installing a Dynamic Sauna
For added clarity, refer to the video tutorial provided by the manufacturer. It offers step-by-step visual guidance to assist your installation process and avoid common errors.
Product Manuals
The installation of a sauna can be complex, but with the right resources, it becomes straightforward. Download and review the manual specific to your Dynamic Sauna model for detailed illustrations, safety guidance, and troubleshooting support. Access the dynamic sauna user manuals here.
Maintenance and Care
- Cleaning: Use only sauna-safe cleaning products. Wipe surfaces with a damp cloth. Never spray water directly onto the wood or panels.
- Moisture Protection: Avoid wet environments. Always use a moisture barrier if installing on a damp floor.
Tips for an Enhanced Sauna Experience
- Sauna Rounds: Try multiple short sessions with breaks in between for improved detox and relaxation.
- Session Duration: Start with 10–15 minute sessions and gradually increase as your body adapts.
Parting Thoughts
With your Dynamic Sauna correctly assembled, you’re ready to enjoy its full spectrum of benefits. Safe and mindful use ensures a rewarding experience for years to come. Regular upkeep and thoughtful use are key to getting the most from your investment.
FAQs
What electrical requirements are there for an infrared sauna?
Always use the specified connections and plugs provided by the manufacturer. Do not use extension cords or shared outlets.
How long does it take to put together a sauna?
Typically 2 to 3 hours with two adults, depending on the model and your familiarity with the process.
Should sauna cladding be vertical or horizontal?
Both are acceptable. Vertical cladding helps with moisture runoff, while horizontal offers a modern look. Follow model-specific instructions.
How do you connect a sauna to electricity?
Connect all internal wires and plug the sauna into the designated outlet per Step 7 of the assembly process. Always follow the manual.
How hot do Dynamic Saunas get?
Most models reach between 135°F and 140°F. Refer to your specific model guide for details.
How do you clean a Dynamic Sauna?
Use mild, non-toxic cleaning products. Wipe the interior with a damp cloth after each use. Do not use excess water.
How often should you use a sauna?
3–4 sessions per week are generally recommended for wellness benefits. Consult with a healthcare provider for personal recommendations.